Flatpaks in Fedora – now live

fedora-plus-flatpak

I’m pleased to announce that we now have full initial support for Flatpak creation in Fedora infrastructure: Flatpaks can be built as containers, pushed to testing and stable via Bodhi, and installed by users from registry.fedoraproject.org through the command line, GNOME Software, or KDE Discover.

The goal of this work has been to enable creating Flatpaks from Fedora packages on Fedora infrastructure – this will expand the set of Flatpaks that are available to all Flatpak users, provide a runtime that gets updates as bugs and security fixes appear in Fedora, and provide Fedora users, especially on Fedora Silverblue, with an out-of-the-box set of Flatpak applications enabled by default.

At a technical level, a very brief summary of the approach we’ve taken is to take Fedora RPMs, rebuild them with prefix=/app using the Fedora modularity framework, then using the same container build service we use for server-side containers, create Flatpaks as OCI images . Flatpak has been extended to know how to browse, download, and install Flatpaks packaged as OCI images from a container registry. See my my talk at DevConf.CZ last year  for a slightly longer introduction to what we are doing.

Right now, there are only a few applications in the registry, but we will work to build up the set of applications over the next few months, and hopefully by the time that Fedora 30 comes out in the spring, will have something that will be genuinely useful for Fedora users and that can be enabled by default in Fedora Workstation.

Special thanks to Clement Verna, Randy Barlow, Kevin Fenzi, and the rest of the Fedora infrastructure team for a lot of help in making the Fedora deployment happen, as well as to the OSBS team and Alex Larsson!
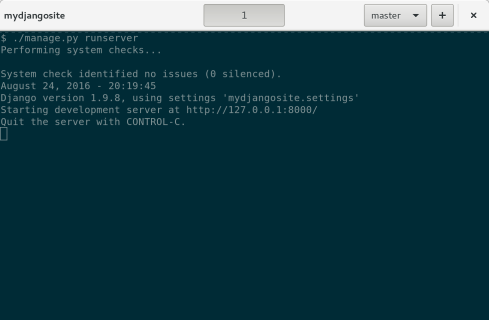
Using it

From the command line, either add the stable remote:

flatpak remote-add fedora oci+https://registry.fedoraproject.org

Or add the testing remote:

flatpak remote-add fedora-testing oci+https://registry.fedoraproject.org#testing

There is no point in adding both, since all Flatpaks in the stable remote are also in the testing remote. (The plan is to eventually that most users will simply use the stable remote, and there will be links in Bodhi to make it easy to install a single application from testing.)

Note that some fixes were needed to make OCI remotes work properly system-wide. These were backported to the Fedora Flatpak-1.0.6 packages, but are only in master upstream, so if you aren’t using Fedora, you should add the remote per-user instead.

Creating Flatpaks

If you are a Fedora packager and want to create a Flatpak of a graphical application you maintain, or want to help out creating Flatpaks in general, see the packager documentation. There is also a list of applications that are easy to package as Flatpaks.

Future work

One thing that should make things easier for packagers is the flatpak common module – by depending on this module, different Flatpaks can share the same binary builds of common libraries. This is particularly important for libraries that take a long time to build, or when an application needs to bundle a large set of libraries (think KDE or TeX). The current flatpak-common is a prototype, and there needs to be some thought given to the policies and tools for updating it.

Automatic rebuilds of Flatpaks are essential: when a fix is added to a library that an application bundles, the module and Flatpak should automatically be rebuilt without the maintainer of the Flatpak having to know that there was something to do – and then the maintainer should be notified, either with a link to a build failure, or, more hopefully, with a link to a Bodhi update that was automatically filed. Adding Flatpak support to Freshmaker and deploying it for Fedora is probably the right course here – though not a small task.

Another thing that I hope to address in the near term is signatures. Right now the authenticity is checked by downloading a master index from https://registry.fedoraproject.org that contains hashes for the latest versions of applications. But having signatures on the images would add further protection against tampering, and depending on how they were implemented, could allow things like third party signatures added by an organization’s IT department. There’s quite a bit of complexity here, because there are multiple competing signature frameworks to coordinate: not just Flatpaks native signatures, but multiple different ways of signing container images.

A more long-term goal is to create a way to download updates to Flatpak container images as deltas, so that every update is not a full download. Reusing OCI images for Fedora Flatpaks has strong advantages for creating a common ecosystem between server applications and desktop applications, but on the server side, reducing bandwidth usage for server updates was usually not an important consideration, so the distribution strategy is simply to download everything from scratch. Hopefully work here could be shared between Flatpaks and the server usage of OCI images.

Summer Talks, PurpleEgg

I recently gave talks at Flock in Krakow and GUADEC in Karlsruhe:

Flock: What’s Fedora’s Alternative to vi httpd.conf Video Slides: PDF ODP
GUADEC: Reworking the desktop distribution Video Slides: PDF ODP

The topics were different but related: The Flock talk talked about how to make things better for a developer using Fedora Workstation as their development workstation, while the GUADEC talk was about the work we are doing to move Fedora to a model where the OS is immutable and separate from applications. A shared idea of the two talks is that your workstation is not your development environment environment. Installing development tools, language runtimes, and header files as part of your base operating system implies that every project you are developing wants the same development environment, and that simply is not the case.

At both talks, I demo’ed a small project I’ve been working on with codename of PurpleEgg (I didn’t have that codename yet at Flock – the talk instead talks about “NewTerm” and “fedenv”.) PurpleEgg is about creating easily creating containerized environments dedicated to a project, and about integrating those projects into the desktop user interface in a natural, slick way.

The command line client to PurpleEgg is called pegg:

[otaylor@localhost ~]$ pegg create django mydjangosite
[otaylor@localhost ~]$ cd ~/Projects/mydjangosite
[otaylor@localhost mydangjosite]$  pegg shell
[[mydjangosite]]$ python manage.py runserver
August 24, 2016 - 19:11:36
Django version 1.9.8, using settings 'mydjangosite.settings'
Starting development server at http://127.0.0.1:8000/
Quit the server with CONTROL-C.

“pegg create” step did the following steps:

  • Created a directory ~/Projects/mydjangosite
  • Created a file pegg.yaml with the following contents:
base: fedora:24
packages:
- python3-virtualenv
- python3-django
  • Created a Docker image is the Fedora 24 base image plus the specified packages
  • Created a venv/ directory in the specified directory and initialized a virtual environment there
  • Ran ‘django-admin startproject’ to create the standard Django project

pegg shell

  • Checked to see if the Docker image needed updating
  • Ran a bash prompt inside the Docker image with a customized prompt
  • Activated the virtual environment

The end result is that, without changing the configuration of the host machine at all, in a few simple commands we got to a place where we can work on a Django project just as it is documented upstream.

But with the PurpleEgg application installed, you get more: you get search results in the GNOME Activities Overview for your projects, and when you activate a search result, you see a window like:

PurpleEgg-screenshot

We have a terminal interface specialized for our project:

  • We already have the pegg environment activated
  • New tabs also open within that environment
  • The prompt is uncluttered with relevant information moved to the header bar
  • If the project is checked into Git, the header bar also tracks the Git branch

There’s a fair bit more that could be done: a GUI for creating and importing projects as in GNOME Builder, GUI integration for Vagrant and Docker, configuring frequently used commands in pegg.yaml, etc.

At the most basic, the idea is that server-side development is terminal-centric and also somewhat specialized – different languages and frameworks have different ways of doing things. PurpleEgg embraces working like that, but adds just enough conventions so that we can make things better for the developer – just because the developer wants a terminal doesn’t mean that all we can give them is a big pile of terminals.

PurpleEgg codedump is here. Not warrantied to be fit for any purpose.

attribute((cleanup)), mixed declarations and code, and goto.

One of the cool features of recent GLib is g_autoptr() and g_autofree. It’s liberating to be able to write:

g_autofree char *filename = g_strdup_printf("%s/%d.txt", dir, count);

And be sure that will be freed no matter how your function returns. But as I started to use it, I realized that I wasn’t very sure about some details about the behavior, especially when combined with mixing declarations and code as allowed by C99.

Internally g_autofree uses __attribute__((cleanup)), which is supported by GCC and clang. The definition of g_autofree is basically:

static inline void
g_autoptr_cleanup_generic_gfree (void *p)
{
  void **pp = (void**)p;
  g_free (*pp);
}

#define g_autofree __attribute__((cleanup(g_autoptr_cleanup_generic_gfree)))

Look at the following examples:

int count1(int arg)
{
  g_autofree char *str;

  if (arg < 0)
    return -1;

  str = g_strdup_printf("%d", arg);

  return strlen(str);
}


int count2(int arg)
{
  if (arg < 0)
    return -1;

  g_autofree char *str = g_strdup_printf("%d", arg);

  return strlen(str);
}

int count3(int arg)
{
  if (arg < 0)
    goto out;

  g_autofree char *str = g_strdup_printf("%d", arg);

  return strlen(str);

out:
  return -1;
}

int count4(int arg)
{
  if (arg < 0)
    goto out;

  {
    g_autofree char *str = g_strdup_printf("%d", arg);

    return strlen(str);
  }

out:
  return 0;
}

Which ones of these do you think work as intended, and which ones are buggy? (I’m not recommending this as a way counting the digits in a number – the example is artificial.)

count1() is pretty clearly buggy – the cleanup function will run in the error
path and try to free an uninitialized string. Slightly, more subtly, count3() is also buggy – because the goto jumps over the initialization. But count2() and count4() work as intended.

To understand why this is the case, it’s worth looking at how attribute((cleanup)) is described in the GCC manual – all it says is “the ‘cleanup’ attribute runs a function when the variable goes out of scope.” I first thought that this was a completely insufficient definition – not complete enough to allow figuring out what was supposed to happen in the above cases, but thinking about it a bit, it’s actually a precise definition.

To recall, the scope of a variable in C is from the point of the declaration of the variable to the end of the enclosing block. What the definition is saying is that any time a variable is in scope, and then goes out of scope, there is an implicit call to the cleanup function.

In the early return in count1() and at the return that is jumped to in count3(), the variable ‘str’ is in scope, so the cleanup function will be called, even though the variable is not initialized in either case. In the corresponding places in count2() and count4() the variable ‘str’ is not in scope, so the cleanup function will not be called.

The coding style takewaways from this are 1) Don’t use the g_auto* attributes on a variable that is not initialzed at the time of definition 2) be very careful if combining goto with g_auto*.

It should be noted that GCC is quite good at warning about it if you get it wrong, but it’s still better to understand the rules and get it right from the start.

gnome-battery-bench

One thing we want to do for the next versions of GNOME and Fedora is to improve battery performance. Your laptop may well be advertised by the manufacturer to have “up to 10 hours of battery life” or some such claim. You probably don’t get anywhere near this.

Let’s put out some rough numbers here to give an overall sense of scale for the problem. For a modern ultrabook:

  • The battery is 50 watt-hours (Wh) – it can power a load of 50W for an hour or a load of 5W for 10 hours.
  • The baseline idle consumption of the system – this is RAM refresh, the power consumption of peripherals in power-saving mode, etc, is 5W.
  • The screen and keyboard backlights, if both turned on to 100%, draw 5W.
  • The CPU/GPU can sustain about 15W – this is a thermal limit, so it can draw more for short bursts, but over time it will be throttled to an average.
  • All other peripherals (Wifi, bluetooth, touchpad, etc.) can use about 5W of power combined when not in power-saving mode.

So the power draw of the system can range from about 5W (the manufacturer’s 10 hours) to 30W (1 hour 40 minutes). If you have such an ultrabook, how is it doing right now? I’d guess it’s using about 15W unless you pay a lot of attention to power usage. Some of the things that might be going wrong:

  • Your keyboard/screen backlights are likely higher than is needed.
  • Some of the devices on your system don’t have power-saving turned on properly.
  • You likely have some background CPU activity (webpage ads, for example).

Of course, if you are running a compilation in the background, you want your CPU to be using that full 15W of power to get it done as soon as possible – in this case, your battery isn’t going to last very long. But a lot of usage is closer to idle.

Measuring power usage

I’ve made assertions above about power used by different things. But how did I actually measure that? powertop is the state of the art for measuring power usage and tweaking it on Linux. It will show you a figure for current battery discharge rate, but it bounces around by several watts; partly because powertop’s own data collection loads the system. The effect of a kernel option is usually much smaller than that. One of the larger effects I discovered on my laptop was that turning USB autosuspend for the touchscreen saves about 150mW. When you tweak a tunable in powertop, without a way to measure power usage more accurately, it’s hard to know whether any observed differences are real.

To support figuring out what is going on with power, I wrote gnome-battery-bench. What it does is pretty simple – it plays back recorded sequences of events in a loop and monitors battery charge to estimate power usage. Because battery usage is being averaged over minutes, a lot of the noise is averaged out. And the event sequences can be changed to exercise different usage patterns by the user.

gnome-battery-benchThe above screenshot shows gnome-battery-bench running a “Light Duty” benchmark that combines scrolling around in a Wikipedia page and typing in gedit. Instantaneous usage bounces around a lot from the activity and from random noise, but after a few cycles the averaged power and estimated battery lifetime converge. The corresponding idle power usage is about 5.5W, so we see then know that we’re using about 2.9W from the activity.

gnome-battery-bench is designed as a graphical application because I want to encourage people to explore with it and find out interactively what is using power on their system. And graphing is also useful so that the user can see when something is going wrong with the measurement; sometimes batteries will report data that jumps around. But there’s also a command line version that can be used for automatic scripting of benchmarks.

I decided to use recorded sequences of events for a couple of reasons: first, it’s easy for anybody to create new test sequences – you just run the gnome-battery-bench command line tool in record mode and do what you want to test. Second, playing back event sequences at a low level simulates user interaction very accurately. There is little CPU overhead, and as far as the desktop is concerned it’s exactly like user input. Of course, not everything can be easily tested by simply playing back canned sequences, but our goal here isn’t to test everything, just to be able to test some things that are reasonably representative.

The gnome-battery-bench README file describes in more detail how it works and how to install it on your system.

Next steps

gnome-battery-bench is basically usable as is. The main remaining thing to do with it is to spend some time designing and recording a couple of sequences that better reflect actual usage. The current tests I checked in are basically just placeholders.

On the operating system, we need to make sure that we are actually shipping with as many power-saving options on for peripherals as can be supported. In particular, “SATA link power management” makes a several-watt difference.

Backlight management is another place we can make improvements. Some problems are simply bad defaults. If ambient light sensors are present on the system, using them can be a big win. If not, simply using appropriate defaults is already an improvement.

Beyond that, in GNOME, we can optimize application and system code for efficiency and to not do things unnecessarily often in the background. Eventually I’d like to figure out a way to have power consumption also tracked by perf.gnome.org so we can see how code changes affect our power consumption and avoid regressions.

perf.gnome.org – introduction

My talk at GUADEC this year was titled Continuous Performance Testing on Actual Hardware, and covered a project that I’ve been spending some time on for the last 6 months or so. I tackled this project because of accumulated frustration that we weren’t making consistent progress on performance with GNOME. For one thing, the same problems seemed to recur. For another thing, we would get anecdotal reports of performance problems that were very hard to put a finger on. Was the problem specific to some particular piece of hardware? Was it a new problem? Was it an a problems that we have already addressed? I wrote some performance tests for gnome-shell a few years ago – but running them sporadically wasn’t that useful. Running a test once doesn’t tell you how fast something should be, just how fast it is at the moment. And if you run the tests again in 6 months, even if you remember what numbers you got last time, even if you still have the same development hardware, how can you possibly figure out what what change is responsible? There will have been thousands of changes to dozens of different software modules.

Continuous testing is the goal here – every time we make a change, to run the same tests on the same set of hardware, and then to make the results available with graphs so that everybody can see them. If something gets slower, we can then immediately figure out what commit is responsible.

We already have a continuous build server for GNOME, GNOME Continuous, which is hosted on build.gnome.org. GNOME Continuous is a creation of Colin Walters, and internally uses Colin’s ostree to store the results. ostree, for those not familiar with it is a bit like Git for trees of binary files, and in particular for operating systems. Because ostree can efficiently share common files and represent the difference between two trees, it is a great way to both store lots of build results and distribute them over the network.

I wanted to start with the GNOME Continuous build server – for one thing so I wouldn’t have to babysit a separate build server. There are many ways that the build can break, and we’ll never get away from having to keep a eye on them. Colin and, more recently, Vadim Rutkovsky were already doing that for GNOME Continuouous.

But actually putting performance tests into the set of tests that are run by build.gnome.org doesn’t work well. GNOME Continuous runs it’s tests on virtual machines, and a performance test on a virtual machine doesn’t give the numbers we want. For one thing, server hardware is different from desktop hardware – it generally has very limited graphics acceleration, it has completely different storage, and so forth. For a second thing, a virtual machine is not an isolated environment – other processes and unpredictable caching will affect the numbers we get – and any sort of noise makes it harder to see the signal we are looking for.

Instead, what I wanted was to have a system where we could run the performance tests on standard desktop hardware – not requiring any special management features.

Another architectural requirement was that the tests would keep on running, no matter what. If a test machine locked up because of a kernel problem, I wanted to be able to continue on, update the machine to the next operating system image, and try again.

The overall architecture is shown in the following diagram:

HWTest Architecture The most interesting thing to note in the diagram the test machines don’t directly connect to build.gnome.org to download builds or perf.gnome.org to upload the results. Instead, test machines are connected over a private network to a controller machine which supervises the process of updating to the next build and actually running, the tests. The controller has two forms of control over the process – first it controls the power to the test machines, so at any point it can power cycle a test machine and force it to reboot. Second, the test machines are set up to network boot from the test machines, so that after power cycling the controller machine can determine what to boot – a special image to do an update or the software being tested. The systemd journal from the test machine is exported over the network to the controller machine so that the controller machine can see when the update is done, and collect test results for publishing to perf.gnome.org.

perf.gnome.org is live now, and tests have been running for the last three months. In that period, the tests have run thousands of times, and I haven’t had to intervene once to deal with a . Here’s perf.gnome.org catching a regression (fix)

perf.gnome.org regressionI’ll cover more about the details of how the hardware testing setup work and how performance tests are written in future posts – for now you can find some more information at https://wiki.gnome.org/Projects/HardwareTesting.